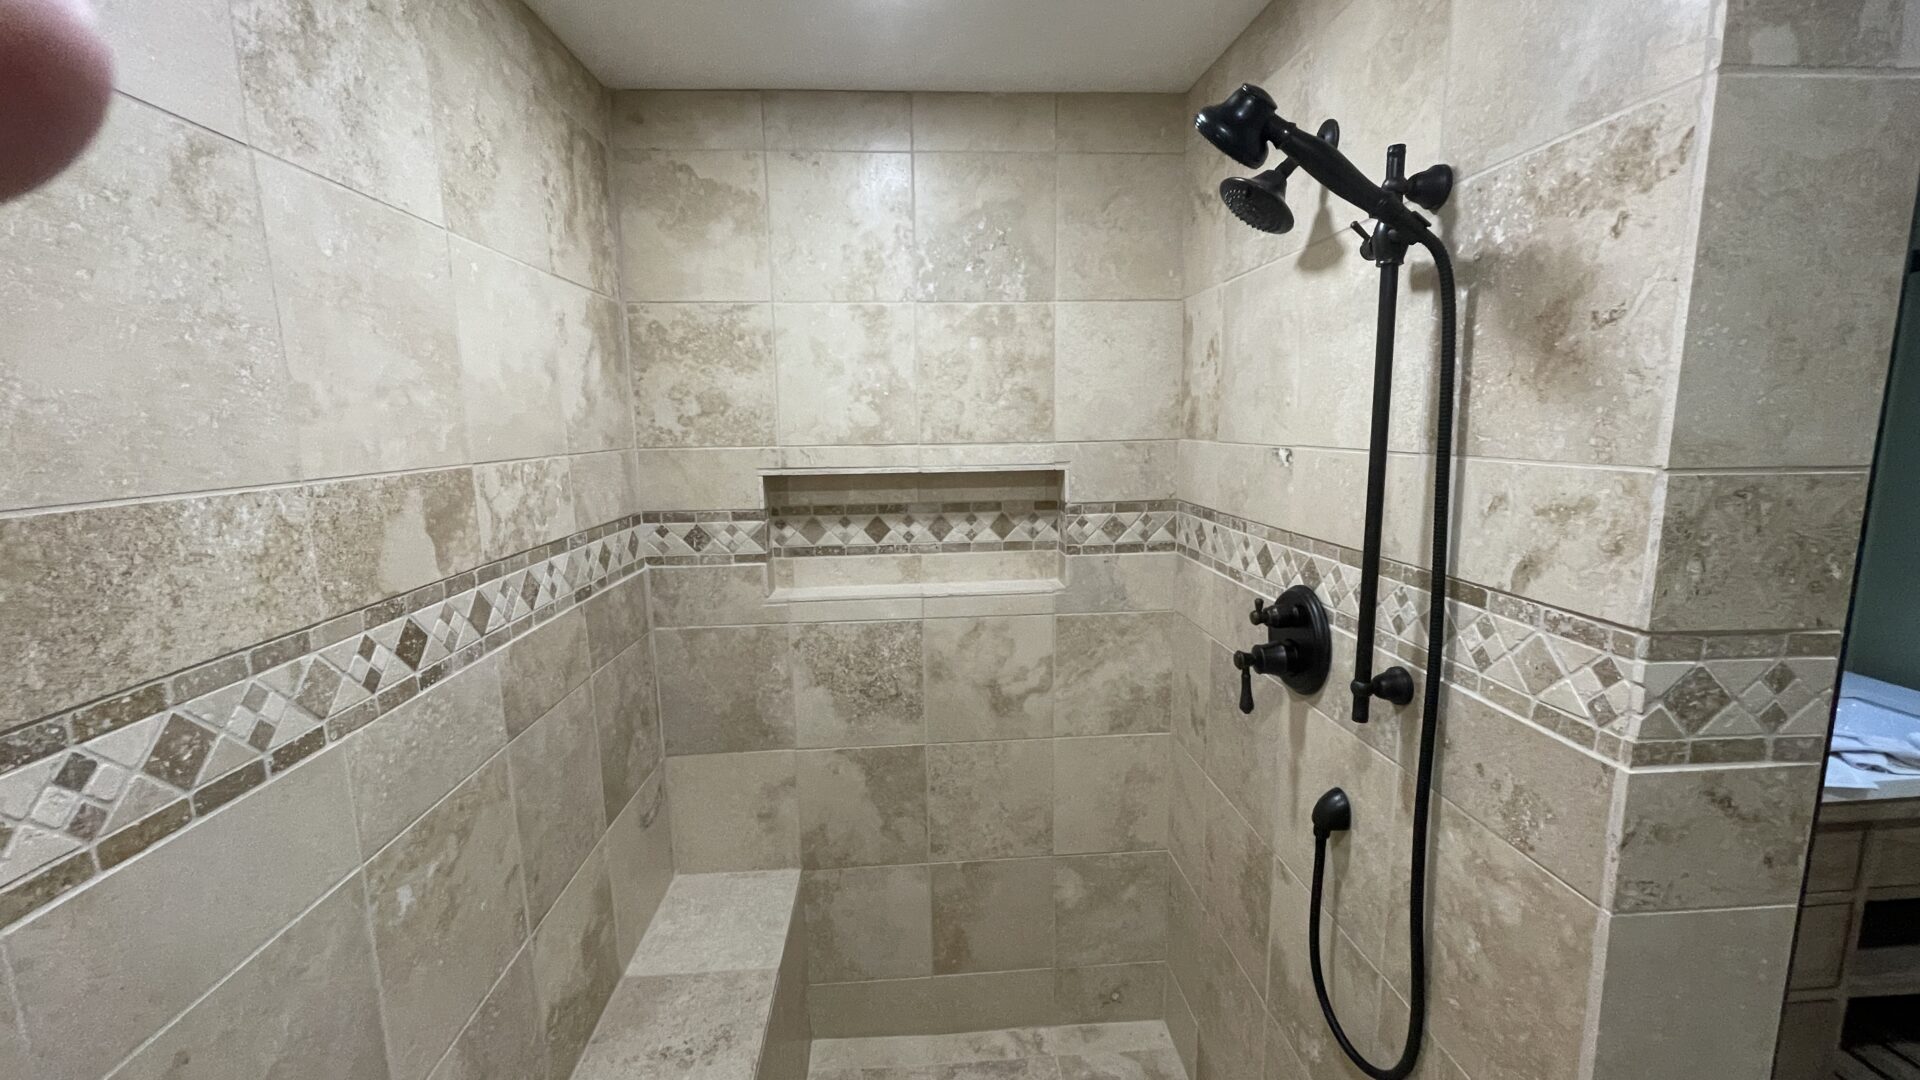
Now that the shower is all tiled and sealed it is time to install the shower heads and controls.
First thing is to install the vertical bar that the removable shower head go in. I had installed a backer board in the proper location before I closed up the walls. I had recorded the location of this backer on the box for the rod. Taking the measurements I drilled a hole in the grout line and into the backer board. Then I mounted the bar attaching it directly to the backer board.
Next step was to mount the hose connector for the removable shower head. Taking a measurement from the elbow to the connector I determined that I needed a piece of pipe 2½” long. I went to our local Ace hardware and purchased exactly what I needed. Then I wrapped the ends of the pipe with Teflon tape and installed one end into the wall and the other end in to the adapter. The length was perfect as when it was tight it was firm against the tile wall. I attached the hose to the adapter and the shower head and that completed the removable shower installation.
Now I need to install the shower head. It was supplied with a pipe to come out of the wall. I wrapped each end with Teflon tape and installed the pipe into the elbow in the wall. Next I installed the shower head and removed any excess Teflon tape.
Now for the shower valve. I removed the dummy plate that was there for pressure testing and installed the water mixer valve. Then I removed the other dummy plate for the shower head selector and installed the valve. Now it was time for me to turn the water back on. I went upstairs and turned on the water while Lisa watched for leaks. All is good.
At this time I discovered that the screws for mounting the cover ring were ¼” too short. Luckily had tested this before going to the hardware store and I had purchased longer screws. I mounted the plate that holds the cover ring. As this ring is going across the accent tile strip I took some caulking and sealed the top half to the accent strip.
Next I installed some vinyl 3/4″ cove molding around the top of the shower. I used some white caulking to fill the nail holes. Also running a small bead on the top and bottom of the molding sealed it to the ceiling and the wall tile. I learned a trick of using a damp sponge to wipe the caulking down and it soothes everything out and looks very professional.